Colouring Line Art
By Melissa Evans
Tutorial Links: Page 1 Page 2 | Page 3 | Page 4 | Page 5 | Page 6
Digital Art Tutorial Recommended for Beginner to Intermediate Level Photoshop Users
INTRODUCTION
The tutorial that follows shows MY way of colouring using Adobe Photoshop. I do not claim to be a Photoshop expert by any means, this is just the technique I use. It’s a really good way of colouring/shading your pictures if you are indecisive about the colour palette, as you can easily change the colours at any stage! Please note this tutorial is written for PC users (because that’s what I use) and for mouse users.
If you are new to Photoshop, then this is a great tutorial for you. I’ve included plenty of imagery to guide you along the way. By the time you have completed this tutorial you will aquired more than a few new skills.

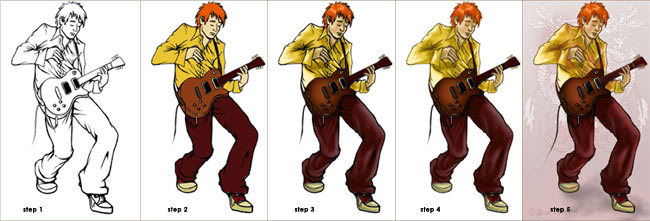
There are five steps to this tutorial…
STEP 1: Separating the line art
STEP 2: Adding colour
STEP 3: Adding depth and highlights
STEP 4: Colouring the line art
STEP 5: Finishing touches

Before you begin, I suggest that you read through this entire Photoshop tutorial.
First,
STEP 1: Separating the line art >>
Tutorial Links: Page 1 Page 2 | Page 3 | Page 4 | Page 5 | Page 6

